How to Make a Candy Bouquet
Learn how to make a candy bouquet for Valentine’s Day, Mother’s Day, Graduation, and more! This candy bouquet DIY tutorial is easy and fun.
Have you ever wondered how to make a candy bouquet? Follow my easy how to guide below! Whether you’re crafting a Valentine candy bouquet or want to put together a chocolate bouquet for a special occasion, you’ll find plenty of tips to make one stunning creation.

This post contains affiliate links.
Are you looking for a homemade gift that looks impressive? I have the perfect task for you! This candy bouquet DIY is the perfect gift for any occasion — Teacher’s gift, Valentine’s Day, Mother’s Day, Father’s Day, Graduation, Birthday gift, etc. Best of all, it’s cheap and makes a great dollar store craft.
Before you head to the store, dig through your wrapping supplies to see what you have on hand. There’s a good chance you may already have most of what you need!
Where to Buy Candy Bouquet DIY Supplies?
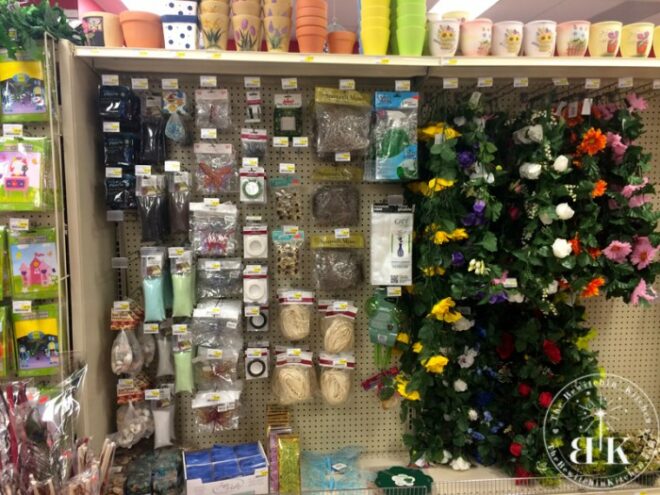
Everything you need to make a candy or chocolate bouquet can be found at your local dollar store!
Floral tape is the most important factor in this craft, but don’t worry — it’s not hard to find. You can find floral tape with the fake flowers in stores like The Dollar Store and Walmart. If you can’t find it, it is available on Amazon.com and Amazon.ca.
You can also find many of the supplies at craft stores, but their candy is often overpriced. In order to save both time and money, stick with a one-stop shopping trip!

Supplies Needed for a DIY Candy Bouquet
- Gift bag
or box (feel free to use seasonal wrapping paper to make the box more playful)
- Dry floral foam block or Styrofoam
- Floral tape
- Package of wooden skewers
- An assortment of candy and chocolate
- Wrapping paper, tissue paper, and cellophane in coordinating colors/designs
- A giant bow
Be sure to remove any price tags or stickers before getting started! It’s easy to forget once you start this candy bouquet DIY tutorial, and it’s a lot harder to dig them out once everything is assembled.
How to Make a Candy Bouquet
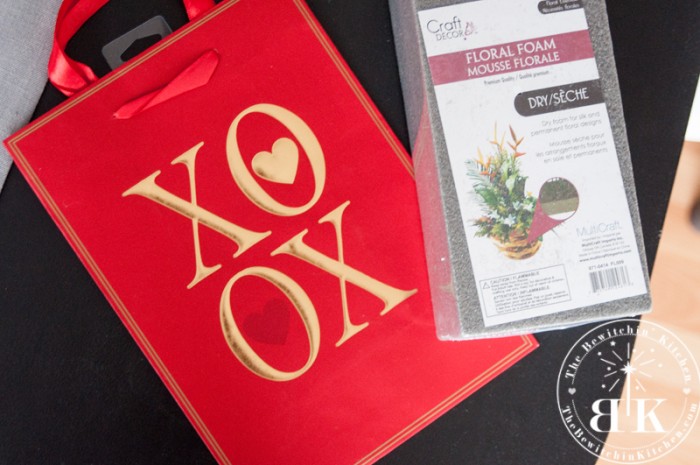
TBK’s Pro Tip: Need a better visual? Watch the video at the bottom of the post to see how to make a candy bouqet from start to finish.
Step One: Gather Your Supplies
First things first, you need to stuff the gift bag, box, or whatever you are using as a base with a floral block. For this particular Valentine candy bouquet, I needed to use two floral blocks. You may need to use more depending on the size of the bag — fill it as close to the top as possible while keeping it sturdy.
Next, you’ll need to wrap your dowels or skewers. It helps if they are pointed on one end so they are easier to push into the floral block.
Wrapping sticks is a technique you need to get down, as you’re going to be doing a lot of it. You will want to keep the floral tape tight as you wrap it (the tape has a little bit of stretch to it). Here’s a short video to give you another view on doing this in case the photos are not clear enough:
Step Two: Create Your Blooms
Now that you have that part down, go ahead and make a few sticks. For this DIY candy bouquet, I made a total of 17. You may need more or less depending on the size of your candy bouquet and the size of the base.
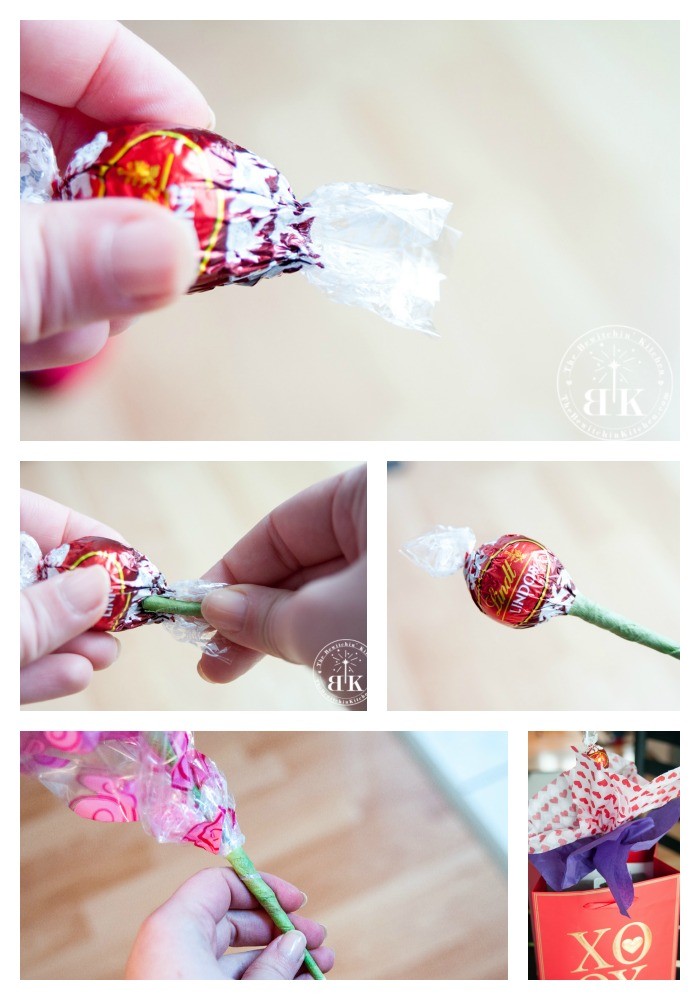
Start by wrapping the different treats to ensure you have enough for your chocolate bouquet. I used a mix of chocolates and candies for my Valentine candy bouquet, but any wrapped treats will do.
The first step is wrapping your candy/chocolate. I use a similar technique as I did with wrapping the sticks. I know a picture is worth 1000 words, but a video is a lot more helpful in cases like this.
Use a similar technique as wrapping the sticks to attach each item to the stick itself. Use tissue paper or cellophane to add “foliage” to each stem and help fill out your DIY candy bouquet — you can simply wrap smaller pieces around the sticks or poke a hole through the center and pinch it together before wrapping.
Trust me, it’s really easy once you get the hang of it!
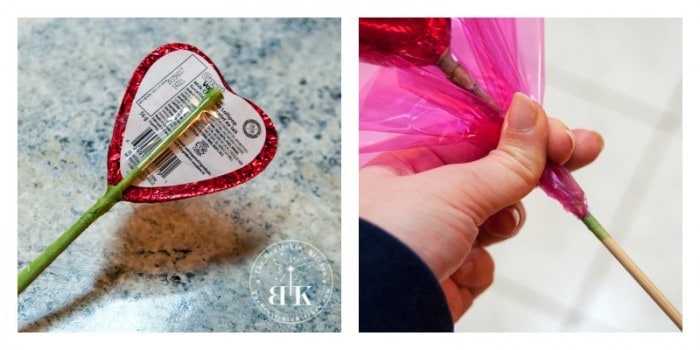
TBK’s Pro Tip: Some items needed a little more support or can’t be wrapped at all (like Airheads), so I like to secure those with strong tape (packing tape works great here).
Step Three: Assemble
Start placing your sugary florals into the foam block, inserting them at varying heights for a full bouquet. Be careful to vary the placement so everything is balanced and there aren’t any noticeable clumps anywhere.
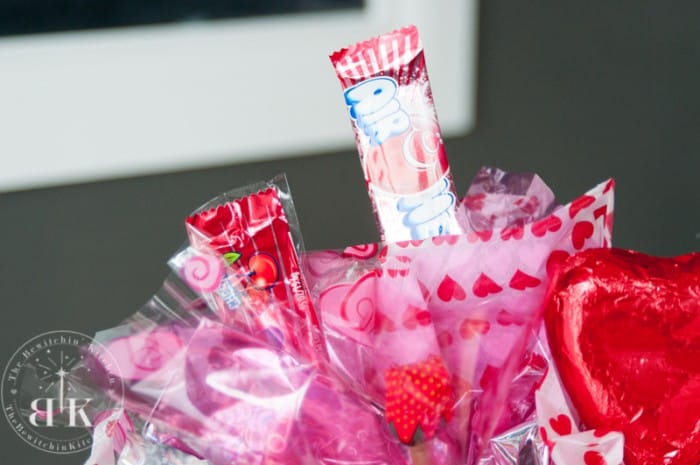
Another tip I want to add is to make sure you have an assortment of candy. For this Valentine candy bouquet, I grabbed chocolate hearts and those strawberry candies that everyone loves but no one buys (except for me, clearly).
Lindt chocolates, Air Heads, and a few other fun and cheap candies filled in the chocolate bouquet nicely, and a giant heart lollipop made for the perfect eye-catching centerpiece.
Step Four: Add Finishing Details to the Candy Bouquet
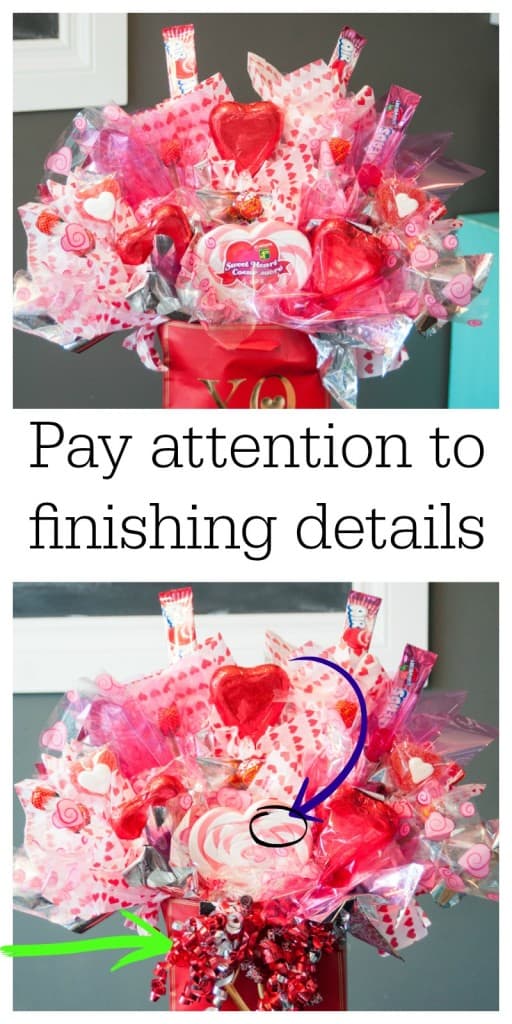
Take a step back and look at your creation. Use extra tissue paper and cellophane to fill in any spots that look empty — you can even attach them to sticks without candy to hold them in place.
I also added two bows to cover up the straps from the gift bag, which worked beautifully. You could also glue down additional candies or themed flourishes to really make your chocolate bouquet unique.
Frequently Asked Questions
How do you make a candy bouquet for other occasions?
It’s all in the details you choose! Gift bags, cellophane, and tissue paper all come in a variety of colors and themes. Simply change up the details to match the occasion.
What are the best candy basket ideas?
There are unlimited candy basket ideas. Use holidays, special occasions, color schemes, or even puns as the base for your bouquet!
I also like to use a sturdy, reusable basket as often as possible when planning out a candy basket. Then, they can use the basket for storage once they’re done with the candy!
How do you make a candy bouquet without foam?
You need the foam for structure so your stems don’t sag or fall over. However, there are plenty of options to create more mystery — or to hide the foam if you’ll be using a see-through base.
Camouflage floral foam with wrapping paper, tissue paper, or decorative paper napkins. You could even stuff basket filler around it for an easy fix that adds bulk as well!
More Candy Bouquet Ideas
5 Beautiful Candy Bouquets Tutorials To DIY
I think any candy bouquet DIY would make an incredible teacher’s gift for the end of the school year or a special way to show appreciation to just about anyone! There are endless candy bouquet ideas you can create for almost any occasion!
So what do you think? If you like it, don’t forget to Pin it!
Looking for more great ideas? Click here to follow me on Pinterest!







WOW! You did an AMAZING job – that would make such an amazing and beautiful gift
Thanks so much! It was a lot of fun to create.
This is such a great idea for a gift. I think it would work great for any holiday not just Valentine’s Day!
Absolutely! I plan on doing a Mothers Day and Fathers day version soon 🙂
Oh now I want that for Valentine’s Day! Love those lindor chocolates
They’re so addictive.
What a great idea!!! I’m actually not a huge fan of flowers… they wilt and die and turn disgusting. But this is fun!!! It will look pretty for a long time, I’m sure. 🙂 Thanks for all the tips!
For as long as it will last 😉 My husband has ate alot of it already.
what a stunning gift idea! love this. great tutorial!
Thanks Adrian! I am so happy with how it turned out. Thanks for visiting.
This looks so cute, what a perfect gift idea for Valentine’s Day; I love it!
That is ALL KINDS of awesome, WOW!! This will be the first year that the nephew is going to celebrate Valentines Day (since they’re exchanging cards in his jk class,) so thinking I just might have to help him make tiny bouquets for his friends! Thanks for the inspiration! 😀
Oh my goodness, this is just too darling! So easy, too – especially with all your helpful photos and great tips! Definitely pinning to share! 😀
Thanks for coming back Shelley! I appreciate it the pin 😀
This is so awesome! I wouldn’t have even thought to put those chocolates on a stick. Thank you for linking up with the #bestoftheblogosphere.
So pretty and fluffy! Thanks for joining us at the #HomeMattersParty – we hope to see you again this Friday!
Very cute idea, and what a great job you did…………lovely……………..thanks for sharing it.
Blessings, Nellie
Cute. Thanks for sharing these easy instructions. Pinned!
Thanks for letting me know, I linked up!
Thanks for sharing on My 2 Favorite Things on Thursday!! I have Pinned this too!! Don’t forget to come back next week and share some more!! I love having you!
This looks so good! What a creative idea!
That is gorgeous! You did a fantastic job on it. It would make such a lovely gift for pretty much anyone on Valentine’s Day. #client
So cute! I would love to get one of these!
Love this candy bouquet! Thanks for sharing at The Pin Junkie! It’s part of today’s Valentine craft roundup!
This awesome , wonderful tutorial! I will be featuring your post in this week’s Home and Garden Thursday,
Kathy
Great news, thanks Kathy!
I love this idea. You make it look easy. Thank you for linking up to Party Time and we hope to see you again next week!
What a fabulous idea! You did such a beautiful job putting it all together. Stopping by from What to do Weekends.
This is brilliant craft idea, I’d love to receive one of these. This has been featured as one of my favourites over at Sweet and Savoury Sunday. Stop by, grab a button and link up again with us this week. Have a great day!
Thank you for the feature 🙂
WOW! That’s absolutely beautiful! I made one one but it didn’t look anything like yours lol
Wow you did a amazing job, you could sell these! It looks like they came from the store. Great to see that you can achieve the same store bought look, awesome post.
Well done! Much better than flowers I think 🙂
Whoa that looks like a professional (and expensive) gift basket done for next to nothing. It seriously looks fabulous. A gift basket online store would charge $60+ for something like that!
Such a super cute idea! Definitely going to make them for my boys.
You can use this idea for baby showers, birthdays, anniversaries. It is so much cheaper to make your own personalized gift basket than buying it. I think your gift basket for Valentine’s Day turned out gorgeous!
A candy bouquet is a great gift idea not just for Valentine’s Day but for any special occasion. Thank you for sharing this post.
I make candy bouquets all the time with tissue paper…which doesn’t transport well. The cello-bags was a great inexpensive idea rather than spending lots of money on the “real deal” cellophane.
Quick tip…I’m making about 50 bouquets for VDAY, rather than wrap 500 sticks I was able to find them in colors 🙂
Thanks!!!
this was very inspiring and less time than it usually takes me
thank you very much for sharing
Would you be willing to make these candy arrangements to sell full time. If it sounds like something you would be interested in then email me and I could get some advertising and a website working to sell your arrangements