Pumpkin and Apple Pie-in-a-Pie + Video
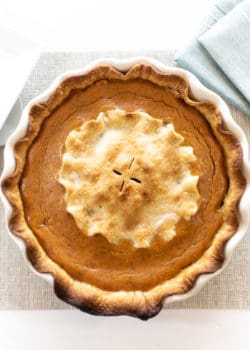
This is the bewitching story of how to make an apple pie, how to make a pumpkin pie, and how to snap your fingers to turn them into a unique holiday treat! This pie-in-a-pie is the best Thanksgiving dessert and a real crowd pleaser. I hope you enjoy this and all the fall flavors we have on the Bewitchin’ Kitchen! This pie also pairs great with our pumpkin spice latte or a pumpkin cocktail.
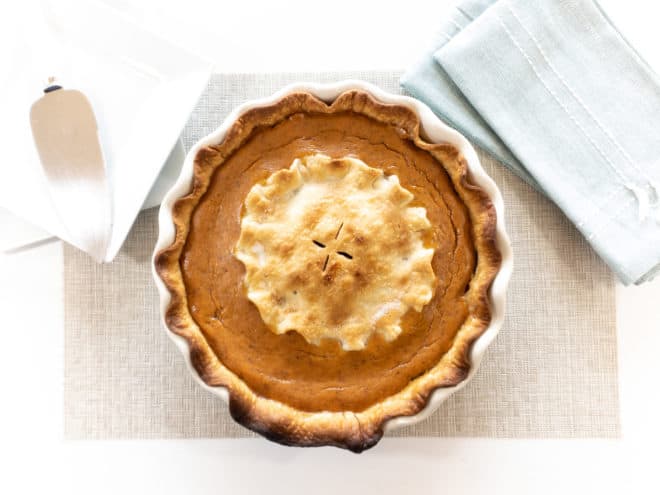
This recipe started with a dream. It was a dream kinda like Stephanie Meyer’s famous Edward dream that kicked off her multi-million dollar Twilight franchise. However, insted of dreaming about hot vampires, I was dreaming about pie. And not just any pie. It was about a pie inside of a pie. Yep, two pies in one. I woke up and told my husband about my pie-in-a-pie idea. He said I’d probably need a special pan or something. But I had other plans. I knew I could do it, and guess what? I actually did… like on the first try! It was amazing! The inside and outside crusts held perfectly! The fruit in the apple and pumpkin filling cooked without any problem!
I chose pumpkin and apple because the flavors compliment each other and because the two cook at about the same temperature for about the same amount of time.
There’s a saying that the universe will give you one really good idea to encourage you toward the right path. With one dream, sent from pie-heaven (or more likely from my great grandmother, who taught me to make pies), I couldn’t believe it. I think, I solved the age old problem of which pie to choose during the holidays. Would you like apple or pumpkin? Umm… Yes!
I would suggest watching my video because there are a lot of directions, and it’s easier to just see what I’m doing. And of course, I will also give you detailed instructions and pictures below!
Start with Two Pie Crusts
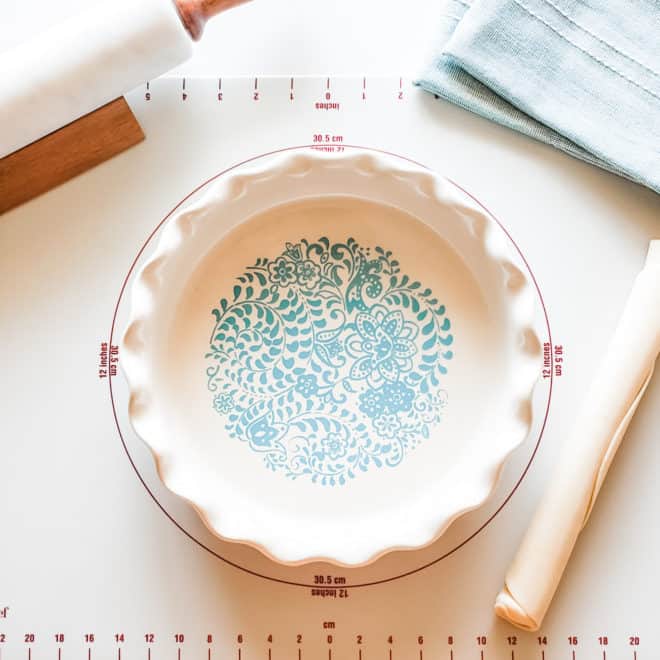
You’ll need a deep dish pie plate. Something that’s around 9.5 inches will work. I also recommend using a mat and a marble rolling pin. I like marble rolling pins because they are heavier and you’ll get the job done with ease.
I use pre-made pie crusts. They’re usually found close to the eggs/dairy/cookie dough section of your grocery store. If you would like to make your own pie crust, it would have to be a very sturdy recipe. My great-grandmother always told me that the pie crusts taste the same, so just buy the ready-made ones. (Yikes! I know some of you will disagree, but I also know these crusts work for this recipe, so I’d recommend using this type, and I’d also recommend getting a name-brand.)
First: You’re going to spray your pie plate with some kind of oil. I use coconut oil spray, you could also use butter or something as easy as Pam would work too. You just need some kind of very thin layer of oil there so that when you go to get the pie out, it comes out nice and pretty.
Second: You’re going to roll the crust out, like you would with a regular pie, and set it in the pie plate, sticking the dough to the plate. Either flute the edges or use another method like forking the edges.
Creative Pie Crust Time!
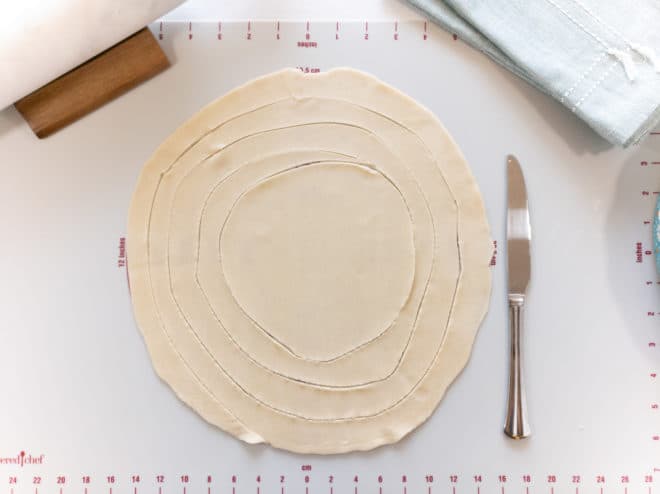
Set aside your pie plate, and roll out the second pie crust until it hits about 12 inches. With a butter knife, cut the pie crust in a spiraling motion (about an inch) all the way around. You need to leave a circle that’s about six inches round. As you can see, this doesn’t have to be exact. If you have a fancy measurement system like this, awesome! But the first time I made this pie, I didn’t have any measurements at all, and it worked great too! Just cut out a spiral, until you’re about half way done, and leave a circle in the middle. If your center circle is too small, it’s okay. Dough is pretty forgiving. You can always roll it out more later.
When you have your spiral cut out, gently pull on the spiral. It doesn’t need to stick together. If it falls apart, that’s okay. You should end up with dough that looks a little like ribbons.
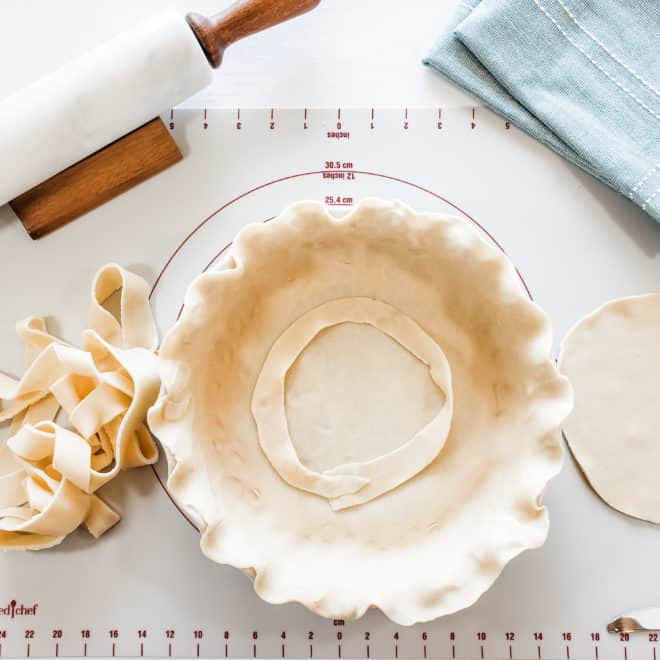
Take a first strip of ribbon, and create a circle like the picture above. You need to be a little over three finger’s width from the sides (about two inches).
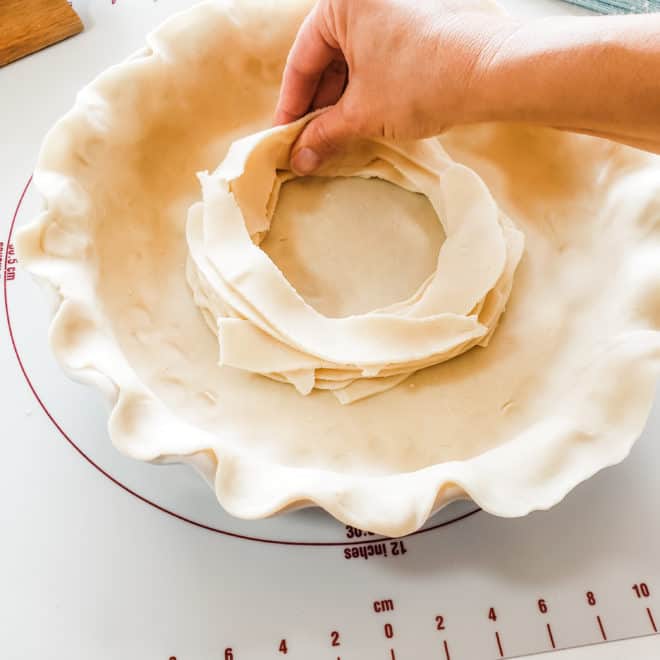
Stack the remaining ribbon, one on top of the other until you have built up your circle as much as possible. Then pinch the sides of the dough together all the way around. It should feel like the consistency of play-dough beneath your fingertips. During this step, you are creating an inner wall of crust. It should stick completely to the bottom crust. Make a circular wall that won’t let the second pie filling penetrate it. It should be fairly thick and completely worked together, like this:
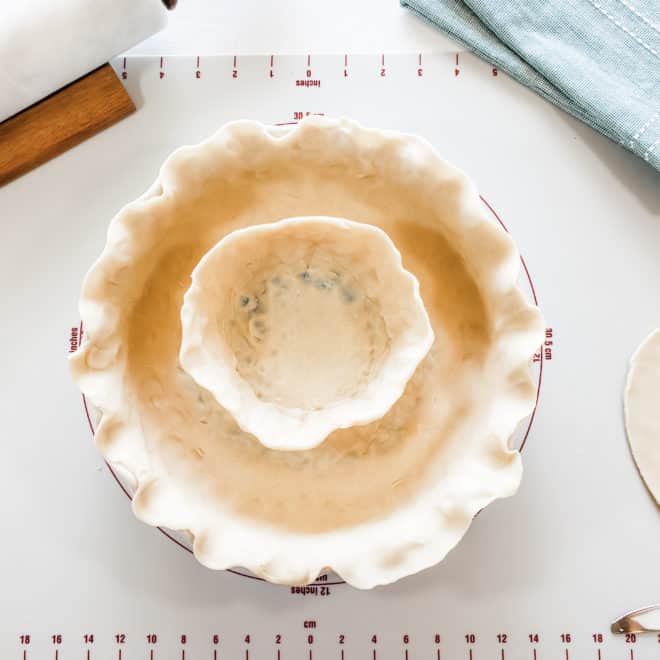
Apple Pie Filling
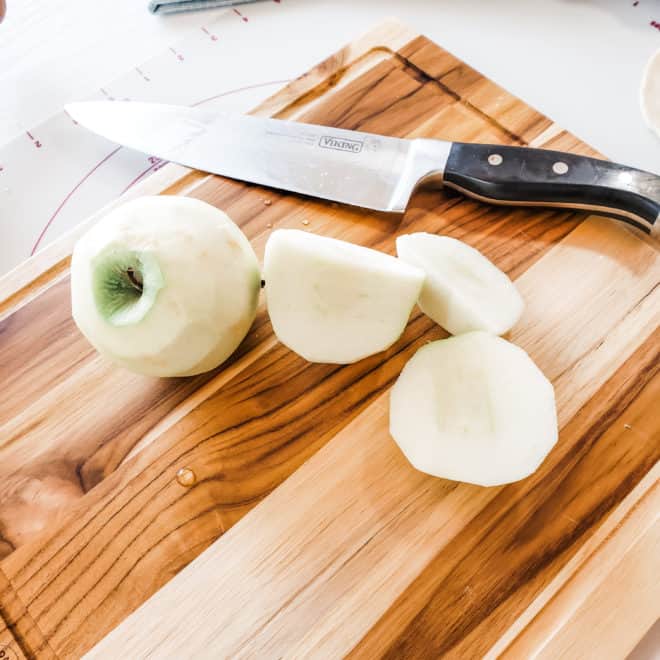
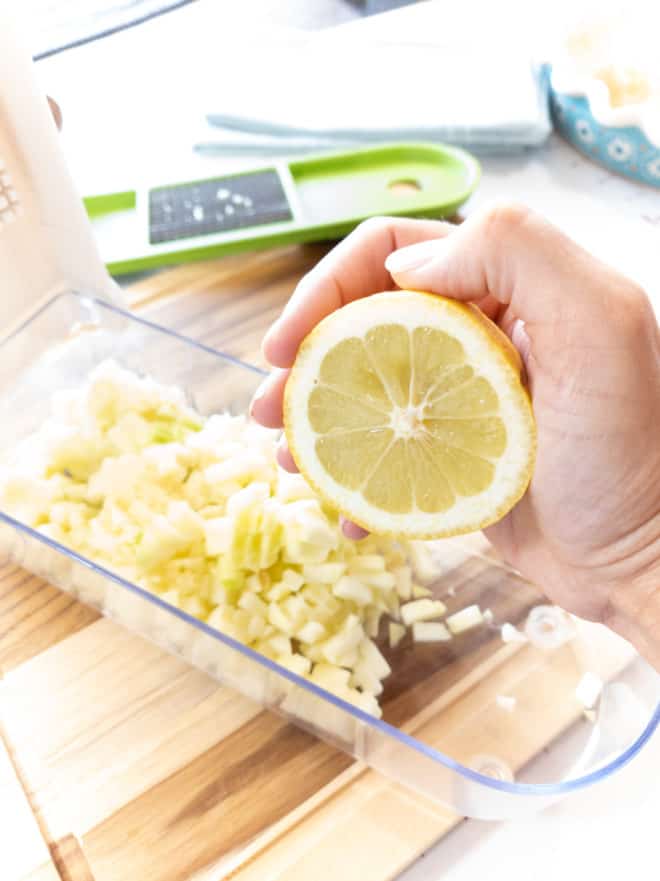
Peel and cut two green apples. You can either finely slice and dice them yourself, or if you have a veggie chopper, this is much easier. Chop up your two apples, and (optional) add a squeeze of lemon.
In a separate bowl, mix together: flour, cinnamon, salt, nutmeg, and sugar. Pour the mixture over your apples and stir. When you are all mixed up pour the apples into the center of the pie-in-a-pie.
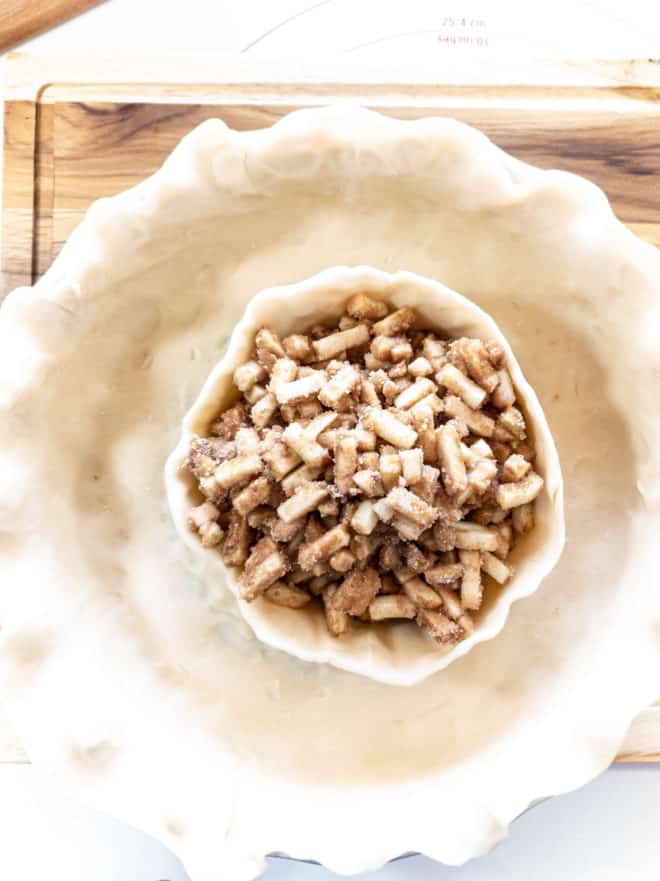
Now take your set-aside circle of dough and top the apple pie, pressing the edges together and rolling them downward so that you have sealed the apples inside. Flute the edges of the pie, and cut small holes with a knife in the top. (Optional: you can top with a bit of coconut oil and a dusting of sugar.)
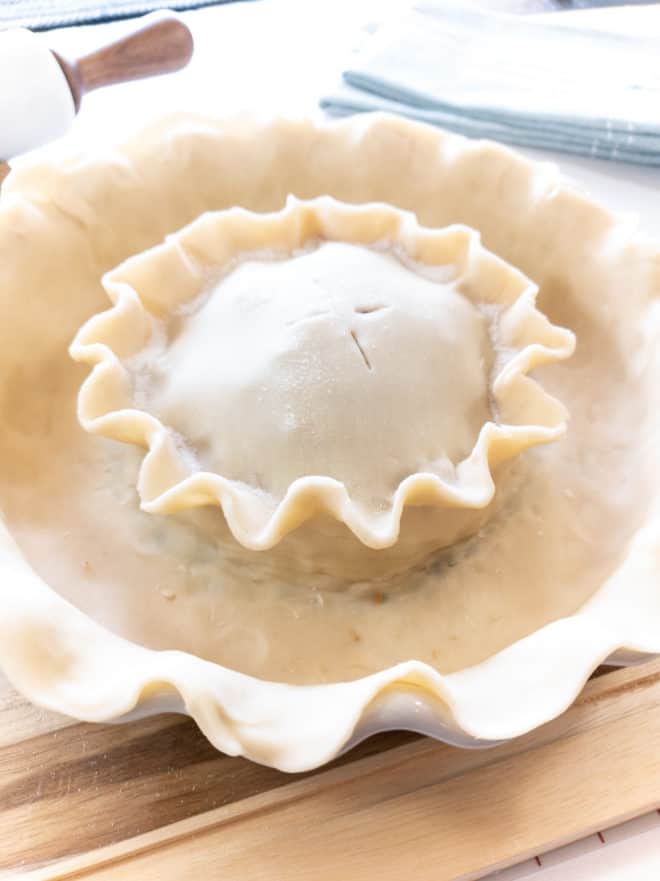
Pumpkin Pie Filling Time!
In a separate bowl, add canned pumpkin, eggs, evaporated milk, cinnamon, pumpkin-pie spice, and sugar. Using a mixer or a Kitchen Aide, blend together ingredients, and pour into the gap between your first apple pie and the outside pie crust.
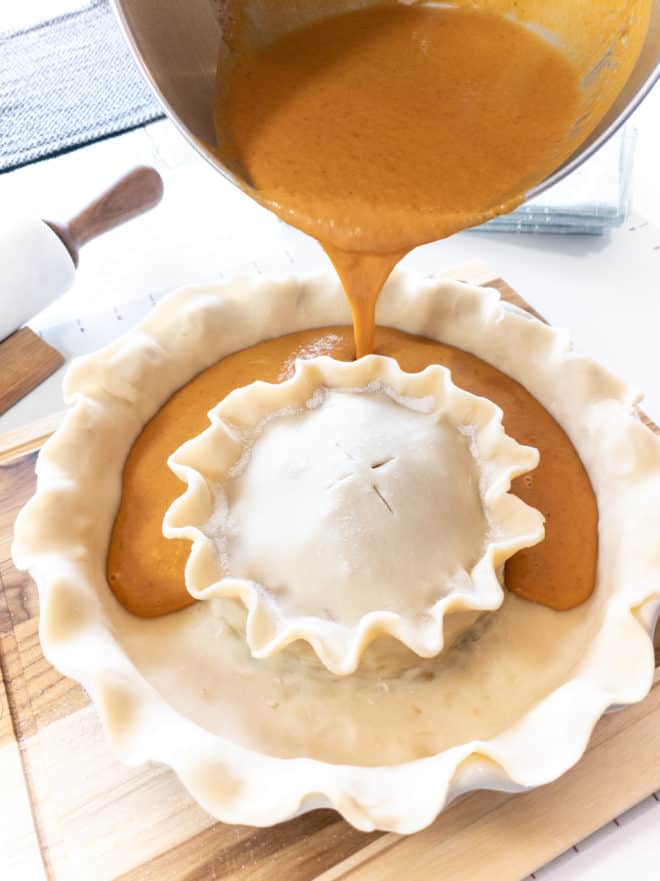
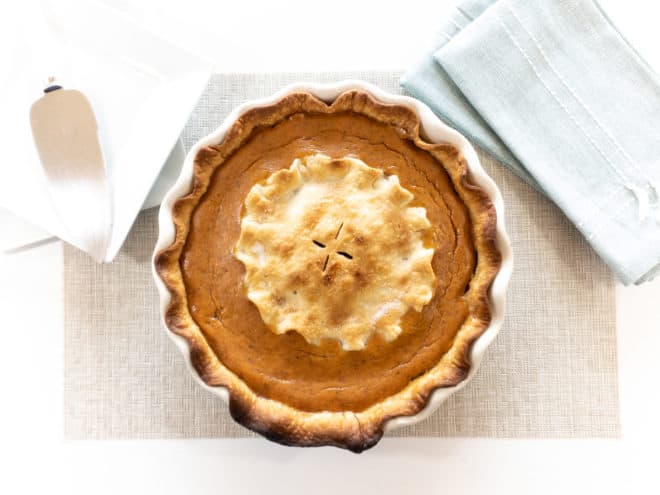
Bake at 400 degrees for thirty minutes, and then turn down the oven to 350 degrees for another twenty to twenty-five minutes. The edges of your crust will seriously darken, but don’t freak out. It’s better to make sure the pie is all the way baked through than take it out early. I made the mistake of taking it out early before, and it’s no good. Check to make sure the pumpkin filling is done by inserting a knife inside the middle of the pumpkin. If it pulls out clean, it’s done. Cool the pie on a rack for 1-2 hours.
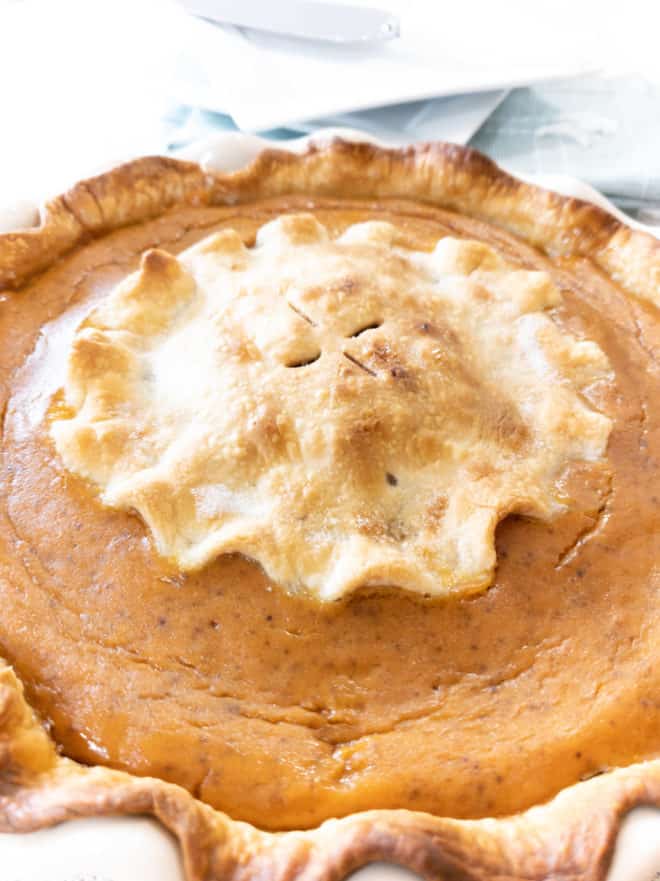
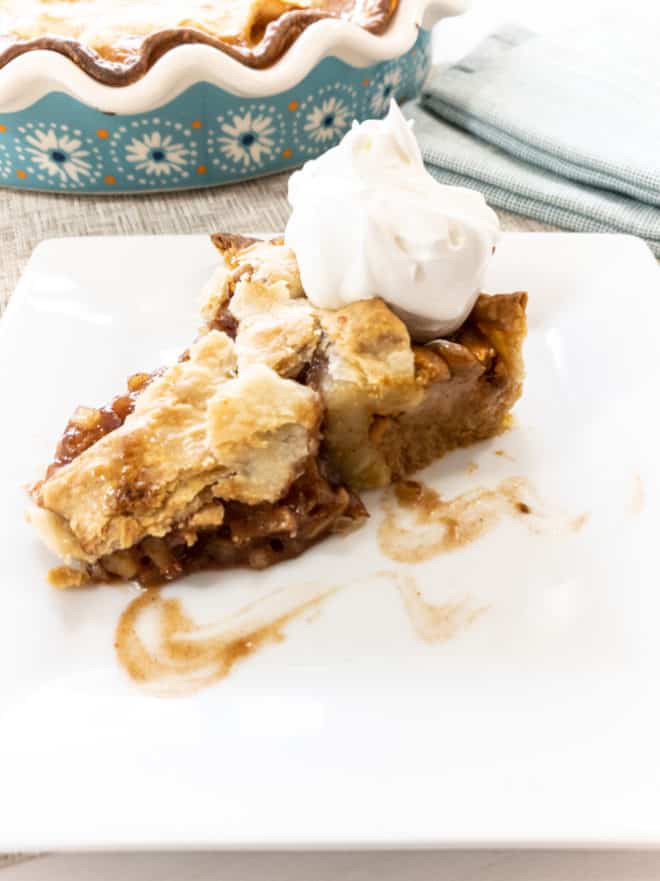
Top with whipped cream, and voila! You have succesfully created a pie miracle. Take that to your holiday party, and watch heads turn! It also pairs great with a pumpkin spice latte. Refrigerate the left-overs, (and don’t tell, but it’s a great cheat-day breakfast- ha!).
For more fall flavors check out: Iced Maple Pumpkin Spice Latte, 13 Pumpkin Cocktails to Get Your Fall On, Pumpkin French Toast Casserole, Pumpkin Oatmeal Bars, Pumpkin Soup, Pumpkin Cheescake Hand Pies, and Pumpkin Pie Cinnamon Rolls
What’s your favorite pie? Leave it in the comments.
Pumpkin and Apple Pie-in-a-Pie
Equipment
- 9.5" pie plate
- mixer
- oven
Ingredients
- 2 tbsp flour all-purpose
- 2 tsp cinnamon
- 1/8 tsp salt
- 1/8 tsp nutmeg
- 5/6 cup sugar
- 1/4 teaspoon salt
- 2 green apples peeled and diced
- 1 tsp lemon juice
- 4/3 cup pure pumpkin canned
- 1 tsp pumpkin pie spice
- 2 eggs
- 2 premade pie crusts
Instructions
- Preheat oven to 400 degrees.
- Spray your pie plate with coconut oil or another thin layer of lubricant.
- Roll the crust out, like you would with a regular pie, and set it in the pie plate, sticking the dough to the plate. Either flute the edges or use another method like forking the edges.
- Set aside your pie tin, and roll out the secondpie crust until it’s about 12 inches.
- With a butter knife, cut the pie crust in a spiraling motion (about an inch) all the way around. You need to leave a circle that's about six inches round in the middle that will act as the top of the apple pie later.
- Gently pull up the spiraled dough away from the center circle. You should end up with dough that looks like ribbon.
- Take a first strip of ribbon, and create a circle in the middle of the pie. You need to be about three finger's width from the sides (about two inches).
- Stack the remaining ribbon, one on top of the other, until you have built up your circle as much as possible. Then pinch the sides of the dough together all the way around. It should feel like the consistency of play-dough beneath yourfingertips. During this step, you are creating an inner wall of crust. It should stick completely to the bottom crust. Make a circular wall that won'tlet the second pie filling penetrate it.
- Peel and cut two green apples. You can eitherfinely slice and dice them yourself, or if you have a veggie chopper, this ismuch easier. Chop up your two apples, and (optional) add a squeeze of lemon.
- In a separate bowl, mix: 2 tsp flour, 1 tsp cinnamon,1/8 tsp salt, 1/8 tsp nutmeg, and 1/3 c sugar. Pour the mixture over apples and stir.
- Take your set-aside circle of dough and top the apple pie, pressing the edges together and rolling them downward so that you have sealed the apples inside. Flute the edges of the pie, and cut small holes with a knife in the top. (Optional: you can top with a bit of coconut oil and a dusting of sugar.)
- In a separate bowl, add 1 and 1/3 cup canned pure pumpkin, 2 eggs, 1cup evaporated milk, 1 tsp cinnamon, 1 tsp pumpkin-pie spice, and ½ cup sugar.
- Bake at 400 degrees for thirty minutes, and then turn down the oven to 350 degrees for another twenty to twenty-five minutes. Check to make sure the pumpkin filling is done by inserting a knife inside the middle of the pumpkin. If it pulls out clean, it's done.
- Cool the pie on a rack for 1-2 hours.
Video
Nutrition
TBK’s Pro Tip


Very nice , easy and delicious recipe .